Generate Inventory Reports (Library Manager and Media Manager)
The In Progress & Completed Inventories report lets you view a summary of your inventories and generate reports listing the copies in them.
For in-progress inventories, you can see which copies still need to be found.
To generate an In-Progress Inventory report:
- Access the report in one of the following ways:
If you select: Then: Reports > Library Reports - In the Inventory Control section, click In-Progress Inventories.
Admin > Inventory - Click the View In-Progress & Completed Inventories link.
- Click the In Progress sub-tab.
- To sort the list, click any column heading to sort in descending order. Click again to sort the list in ascending order.
- Click View next to the inventory.
- At Report on, select the copies to view in the report:
- Copies in the inventory
- Copies that have been 'Accounted For'
- Copies that are 'Unaccounted For'
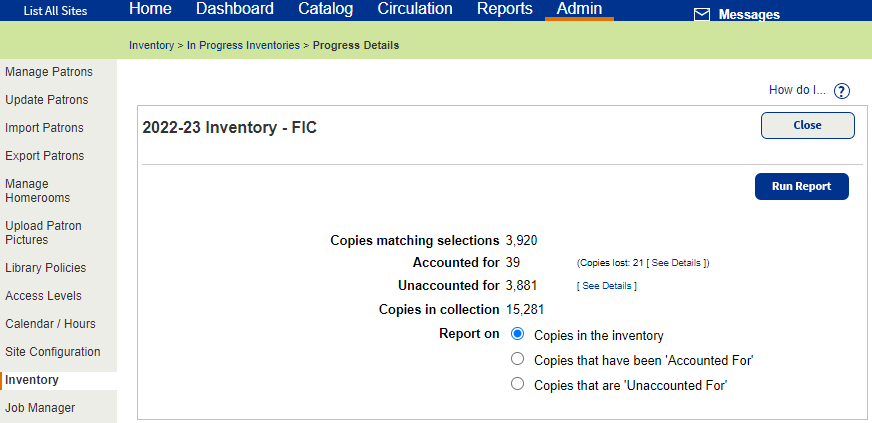
- Click Run Report. Job Manager displays your report at the top of the list. The status automatically updates.
- When the status is Completed, do one of the following:
- To view the Job Summary, click View.
- To open the report as a PDF, click PDF.
To generate a Completed Inventory report:
- Access the report in one of the following ways:
If you select: Then: Reports > Library Reports - In the Inventory Control section, click Completed Inventories.
Admin > Inventory - Click the View In-Progress & Completed Inventories link.
- Click the Completed sub-tab.
- Click View next to the report. The Job Summary displays a summary of the report options.
- Click Report to view the full report.
To delete a completed inventory, click Remove. Once you delete an inventory, you can no longer generate its reports.
Once you delete its Completed Inventory Report, you can no longer view the completed inventory.
Report Contents
At the top, the report shows the name of the inventory, the school name, and the overall totals of Accounted For and Unaccounted For copies.
The report is first grouped into Accounted For and Unaccounted For sections. If you generated an In-Progress report and chose Accounted For or Unaccounted For, the report is limited to those copies.
For each copy, the report includes columns for the following information:
- Copy barcode number
- Call Number
- Author
- Title
- Date the copy was last seen
The date the report was generated appears at the bottom of the last page.
Sort Order
If you chose All copies in the inventory, the copies are grouped into Accounted For and Unaccounted For sections.
The report is sorted first by Call Number, then by Author, and finally by Title.
For each title, the copies appear in numerical order by barcode number.
What is the date last seen?
Every time Destiny updates information about a copy during one of the following transactions or processes, Destiny also updates its date last seen information:
- Check Out (Library Manager)
- Including it in a Pick List (Media Manager)
- Check In
- Inventory
- Individual Update in Update Copies
- Receive in Update Copies (Library Manager)
- Add titles to a Resource List when adding records using a barcode scan, barcode list, or barcode file.
For example, if you checked in several copies or received some transferred from your district cataloger last week, you can set the date to a week ago. Then, you do not need to scan those copies.