Update Patrons Based on a List of Patrons or a Barcode List or File
When you want to update one or more fields in several patron records, use Update Patrons. It lets you change or clear up to three fields at once for individual patrons.
Determine the change to be made. Then identify the patrons by selecting them, creating a list of their barcode numbers, or uploading a file of their barcode numbers.
Update Patrons Based on a Barcode List or File
- Select Admin > Update Patrons > Update sub-tab.
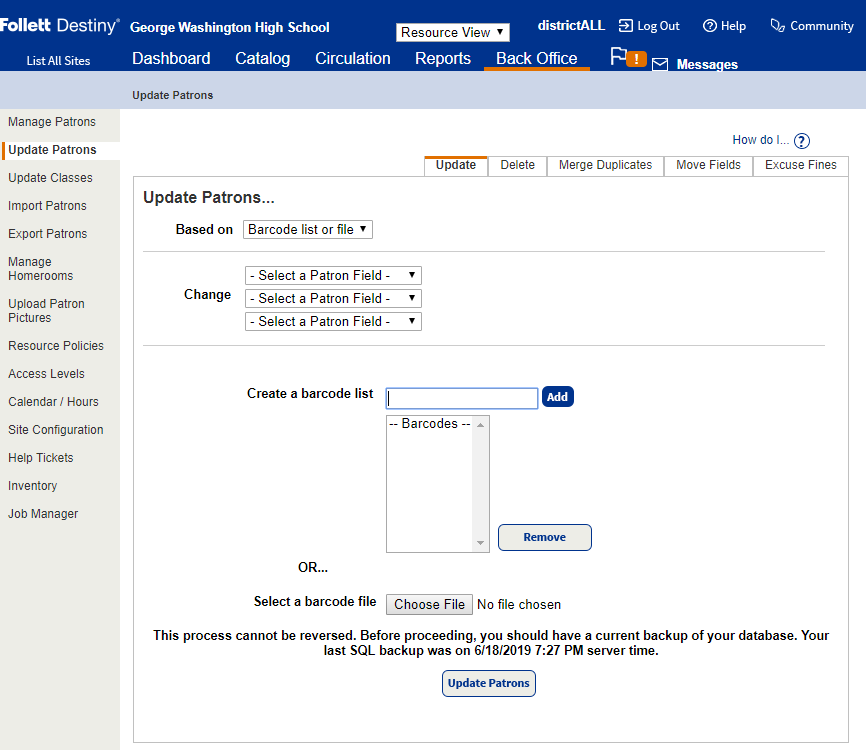
- Use the following table to fill in the fields:
Field Description Based on Select Barcode list or file. Change Select the name of the field that should be changed in the patron records.
In the field after to, select or enter the new content.
Note: To clear a field, leave the to field empty. Barcode list or file Identify the patron records to update.
- To select an existing file, click Browse.
- To create a list, use the Create a barcode list field to scan the barcodes.
Note: To remove a barcode number from the list, select it and click Remove.
- Once you have defined the changes and identified or selected the patrons, click Update Patrons to begin the update.
Destiny generates a Job Summary listing all the updated patrons. To view the report, select Admin > Job Manager.
Update Patrons Based on a List of Patrons

- Select Admin > Update Patrons > Update sub-tab.
- Use the following table to fill in the fields:
Field Description Based on Select List of patrons. Change Select the name of the field that should be changed in the patron records.
In the field after to, select or enter the new content.
Note: To clear a field, leave the to field empty. Find patron records with - To identify the patron records to update, enter a patron's first, middle, or last name, barcode number, nickname, grade level, homeroom, user name, site name, a value in one of the User Defined fields, or a District ID.
Note: If you do not have the whole name or word, enter part of it, followed by *, or use a question mark (?) to replace a single letter. - Click Search.
- In the list that appears, if any, find the correct patron and click Select. That patron moves to the Currently Selected section at the bottom of the page.
- Repeat these steps for each patron.
- To identify the patron records to update, enter a patron's first, middle, or last name, barcode number, nickname, grade level, homeroom, user name, site name, a value in one of the User Defined fields, or a District ID.
- Once you have defined the changes and identified or selected the patrons, click Update Patrons to begin the update.
Destiny Destiny generates a Job Summary listing all the updated patrons. To view the report, select Admin > Job Manager.
Create a File of Barcode Numbers
To create a barcode file, use any method of barcode collection that results in the proper ASCII text format.
- Use Follett Remote to create the file.
Note: Follett Remote is a small single-user application. Follett Panthers and Falcons have it installed. Just tap the icon on the desktop.
- Use a PHD Dolphin+ to create a file of barcode scans, and then transfer the scan file to your workstation.
- Use your circulation desk scanner to scan barcodes into a text editor, such as Notepad or SimpleText.
-
Type the barcode numbers into a text editor.Note: Do not use Microsoft Word, WordPad or Apple TextEdit. Hidden characters created by these programs can cause the upload to fail.
To create the file with a text editor:
- Open your text editor, such as Notepad or SimpleText.
(The file does not need a header.) - Scan or type in the barcodes, one per line.
- Name and save the file. Make sure to save it as a
.txtfile and record the name and location of the file.
- Open your text editor, such as Notepad or SimpleText.
|
Example barcode number file: P 852467 P 15547 33976000651010 33976000651077 33976000651333 P 874 P 55478 P 21947 33976000647646 P 62155 |