Update Copies
Catalog > Update Copies lets you remove copies from your collection, update your library or media copies, change the condition or location of your textbooks, and receive library copies from your district cataloger.
When deleting copies, be aware of the actions that Destiny takes automatically:
- Any fines are retained on the records of the patrons who incurred them.
- Any holds for a library copy are deleted.
Note: If there are other copies, any title holds remain in effect on those.
- Any bookings for a district media copy are deleted (unless there are other copies).
- The total numbers in the Collection Statistics - Summary are not affected by the deletion. When drilling down to view the copies, deleted copies (and their individual statistics) do not appear on the list.
Individual Delete Sub-tab
Individual Delete lets you remove one copy from your collection by scanning its barcode. Use this feature when weeding materials from your collection or retiring old textbooks.
To delete a copy:
- Select Catalog > Update Copies > Individual Delete sub-tab.
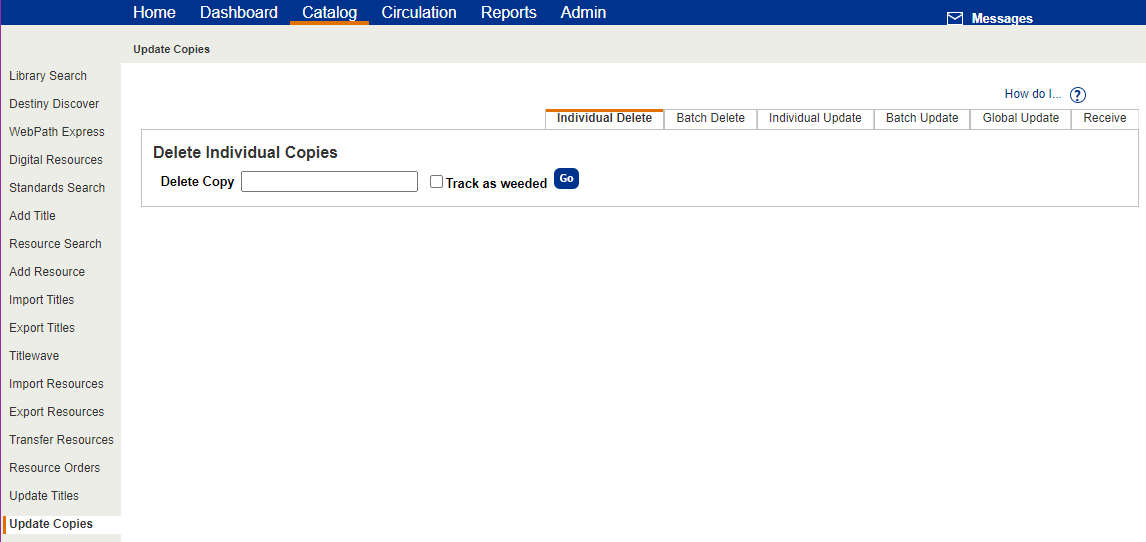
- If you manage library materials for your district, select the school that owns the copies to be deleted in the From drop-down.
- Scan or type the copy's barcode in the Delete Copy field.
- If you manage both your library materials and textbooks in Destiny, select one in the from drop-down.
- To have information about the deleted copies added to the Weeding Log, select the Track as weeded checkbox.
- Click Go.
A Most Recently Deleted list shows the title, barcode number, and call number
Batch Delete Sub-tab
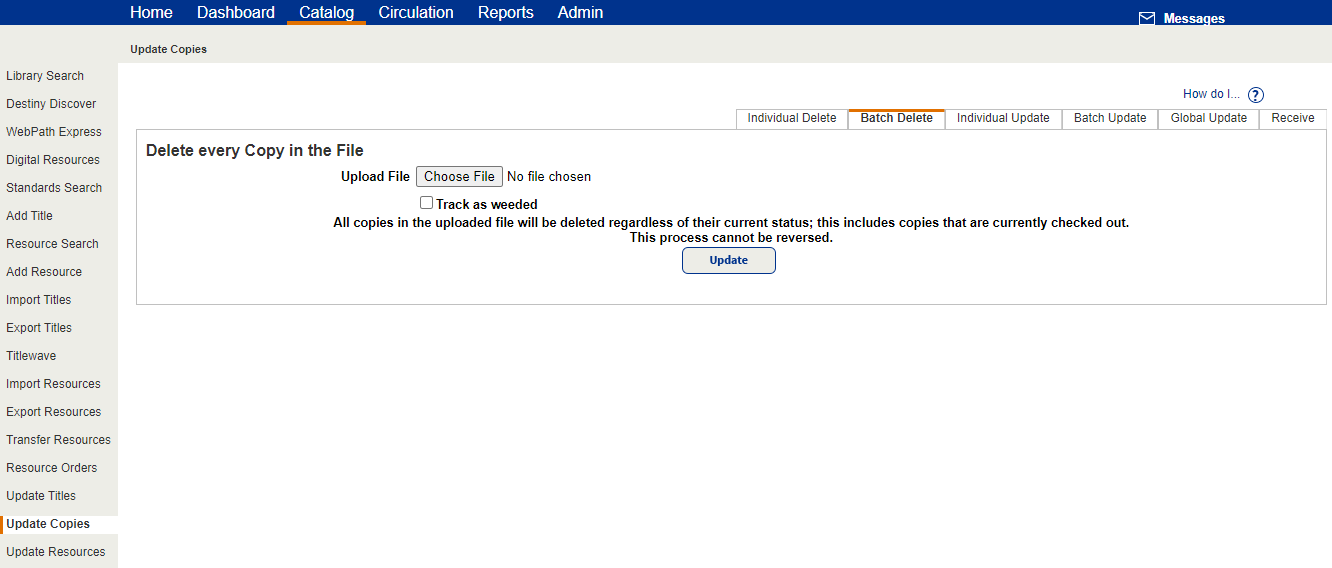
Batch Delete lets you delete a group of copies using a file of barcode numbers.
To delete copies using a barcode file:
- Create and save a text file listing the barcodes of the copies to be deleted. Alternatively, collect the barcode scans with a Follett wireless handheld device, and then transfer the scan file to your workstation.
- Select Catalog > Update Copies > Batch Delete sub-tab.
- If you manage library materials for your district, select the school that owns the copies to be deleted in the From drop-down.
- If you manage both your library materials and textbooks in Destiny, choose the type from the File Contains list.
- Click Browse (or Choose File, depending on your browser) to locate the Scan.Log or text file.
- To have information about the deleted copies added to the Weeding Log, select the Track as weeded checkbox.
- To delete the copies, click Update and then Yes on the confirmation message.
When the delete process ends, Destiny produces a report that lists each copy deleted or skipped, and the reason. To view the report, select it in Admin > Job Manager.
Individual Update Sub-tab
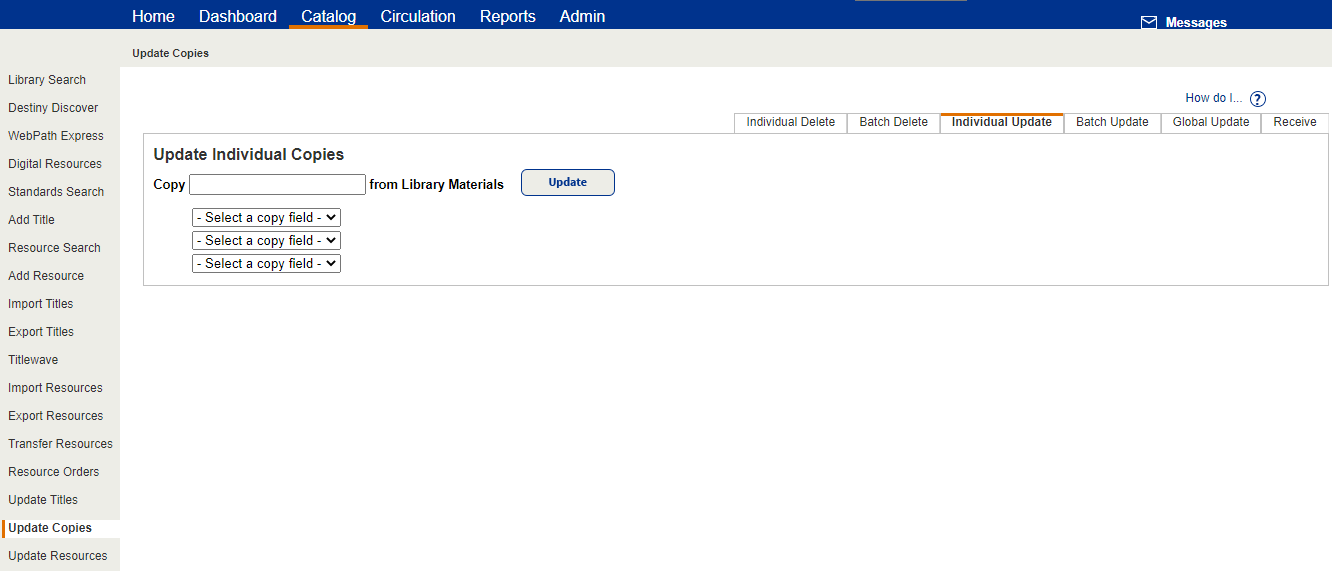
When you want to update one or more fields in a few copy records, use Individual Update. This lets you change the circulation type, assign a category, change or remove the sublocation, or change or add a call number prefix of a library or district media center copy.
|
Note: Circulation Type is not available for district media centers. |
You determine the change to be made, then identify the copies by scanning or typing the copy barcodes. This saves you the time you would otherwise spend editing each individual record.
To update a copy:
- Select Catalog > Update Copies > Individual Update sub-tab.
- If you manage library materials for your district, select a specific school to update from the For drop-down.
- From the first drop-down, select a copy record field to update.
- Select the new contents of the copy record field next to the to drop-down.
Note: To remove the Sublocation from a copy record, select Sublocation from the first drop-down and leave the to drop-down as Undefined. - To update a second or third field, repeat steps 3 and 4. If you are updating only one or two fields, leave the unused lists at Select a copy field.
- Scan or type a copy barcode number in the Copy field.
- Click Update.
- To verify changes, click the barcode number of the updated copy under the Most Recently Updated section.
Batch Update Sub-tab
Batch Update lets you do any of the following for a group of copies:
- Add a category.
- Add, change, or remove the call number prefix.
- Change the circulation type.
Note: This is not available for district media centers.
- Change or remove the sublocation.
You determine the changes to be made, and then identify the copies by creating a list, or uploading a barcode file.
This saves you the time you would otherwise spend editing each individual record.
To update a batch of library copies:
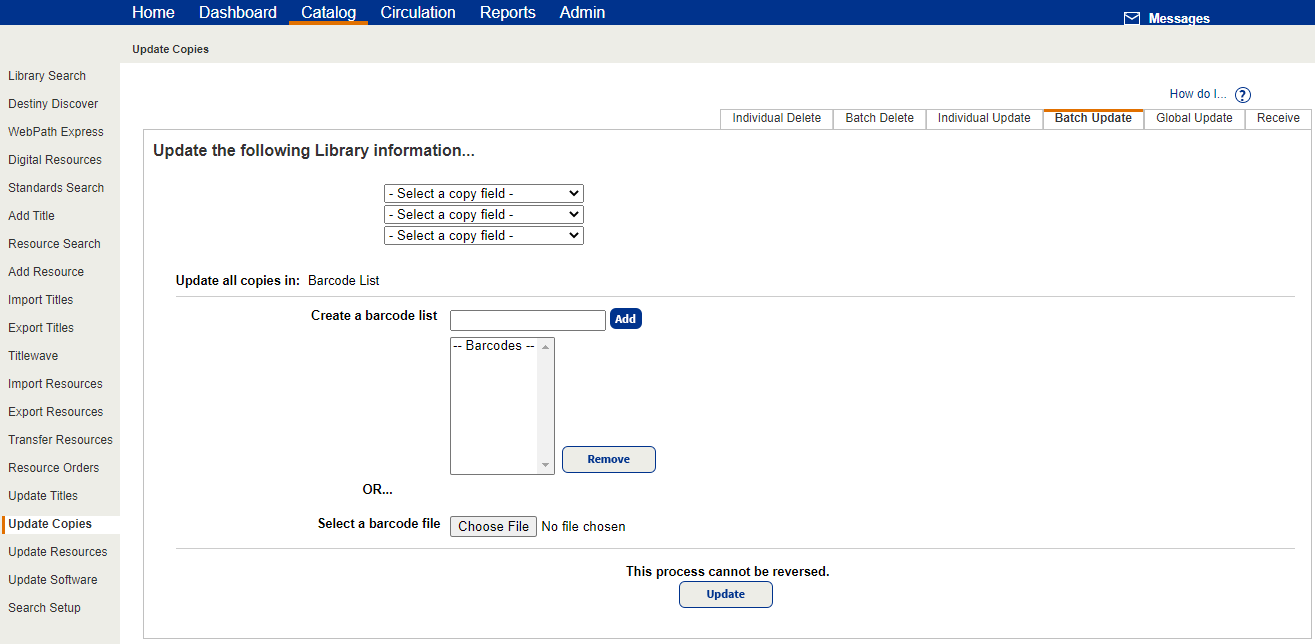
- Select Catalog > Update Copies > Batch Update sub-tab.
- If you manage library materials for your district, select the school that owns the copies to be updated from the Site drop-down.
- If you manage both your library materials and textbooks in Destiny, select Library from the Update the following drop-down.
- From the first drop-down, select the copy field you want to change.
- In the drop-down that appears, select or type the new information.
Notes:
- Add Category does not delete any other categories the copies may have.
- To remove a call number prefix, select Change Call Number Prefix to from the first drop-down and leave the next field blank. This process does not remove a Call Number Prefix if it would leave the copy without any call number.
- To remove a sublocation, select Change Sublocation to from the first drop-down and leave the next field blank.
- To update a second or third field, repeat steps 4 and 5.
- From the Update all copies in drop-down, select a method for identifying the copies to include:
- Barcode List: Either create a new list, or select an existing barcode file:
- Scan or type the barcodes in the Create a barcode list field, and then click Add. To remove a barcode number from the list, select it and click Remove.
- Click Choose File (or Browse, depending on your browser) to locate and select your file of barcode numbers.
- List: Select the Resource List to be updated. To review the contents of the Resource List, click View List.
- Barcode List: Either create a new list, or select an existing barcode file:
- To begin the update, click Update and then Yes on the confirmation message.
When the update process ends, Destiny produces a report that lists each copy updated or skipped and the reason. To view the report, select Admin > Job Manager.
To update a batch of textbook copies:
Batch Update lets you change the condition or the location of a group of textbooks using a file of barcode numbers.
- Create and save a text file listing the barcodes of the copies to be updated. Alternatively, collect the barcode scans with a Follett wireless handheld device, and then transfer the scan file to your workstation.
- Select Catalog > Update Copies > Batch Update sub-tab.
- If you manage both library materials and textbooks in Destiny, select Textbook from the Update the following drop-down.
- Choose to update the Condition or Location:
- To change the condition of the textbooks, select Condition, and then choose the new condition from the list.
- To change the location, select Location, and then choose a location from the list, or click Other to define a new location.
- To change the condition of the textbooks, select Condition, and then choose the new condition from the list.
- Click Browse (or Choose File, depending on your browser) to locate your Scan.Log or text file.
- To begin the update, click Update and then Yes on the confirmation message.
When the update process ends, Destiny produces a report that lists each copy updated or skipped and the reason. To view the report, select Admin > Job Manager.
Global Update Sub-tab
Global Update lets you quickly search your entire library or district media collection for copies containing specific information, and then update that information or the information in another field of those copies.
- Select Catalog > Update Copies > Global Update sub-tab.
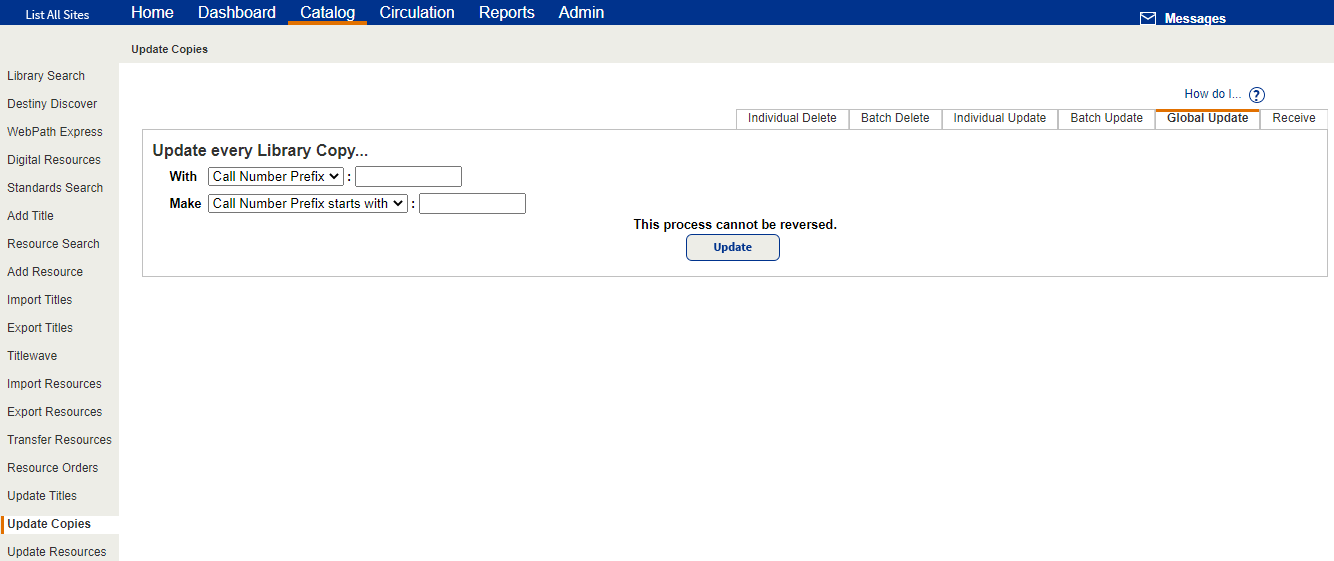
- If you manage library materials for your district, select a specific school to update in the From drop-down.
- From the With drop-down, select the copy field, and then select or type the contents of the field that you want Destiny to find. These selections determine which records are updated.
Notes:
For Funding Source, Sublocation, or Vendor, you can leave the second field blank to find and update those copies for which this information is not defined.
If you select Call Number Prefix, you must enter a letter(s). Entering numbers will return an error.
- From the Make drop-down, select the name of the field you want to change in the copy records, and then select or enter the new information.
Note: Category or Description appears in the Make drop-down only if selected from the With drop-down.
- After making your selections, click Update and then Yes on the confirmation message.
When the process is finished, Destiny generates a report summarizing the update and listing all the copies changed. To view the report, select Admin > Job Manager.
|
Notes:
|
Receive Sub-tab
When your district cataloger has created copy records for you, you can receive them and assign barcode numbers to them.
- Select Catalog > Update Copies > Receive sub-tab.
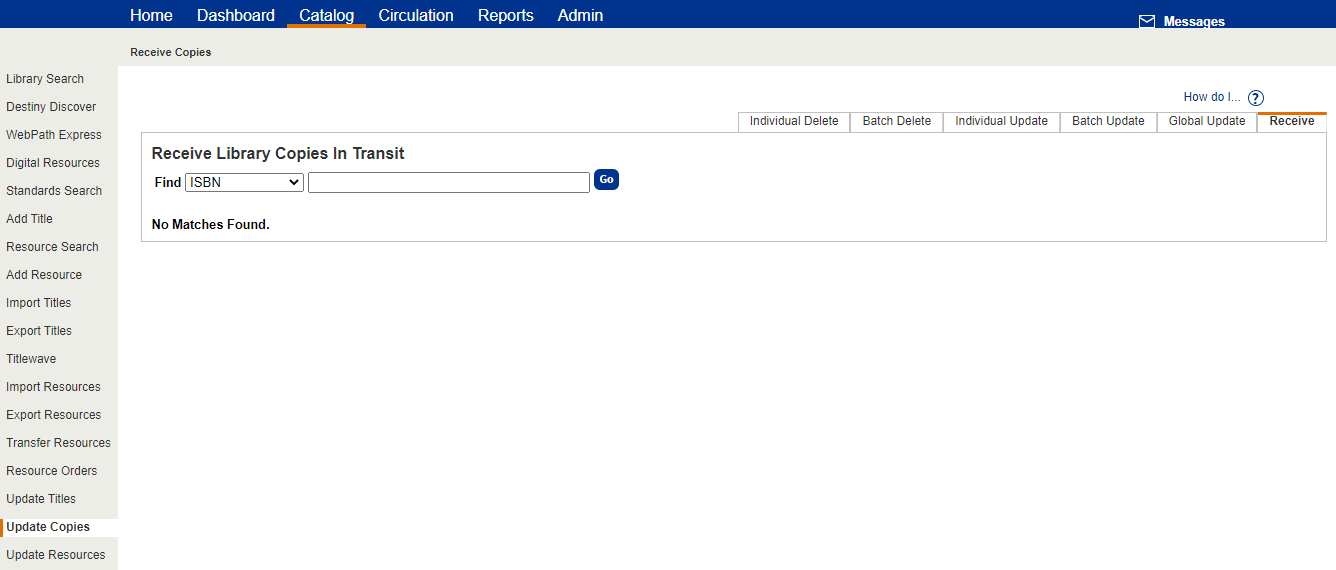
- From the Find drop-down, choose ISBN or Control Number .
- Enter the ISBN or Control Number, which can be found on the Library Copies in Transit list, if your cataloger provided one.
- Click Go.
- Click Receive.
| Note: If the copy already has a barcode number, Destiny removes the copy from the list. If the copy does not have a barcode number, the Edit Copy page opens, enabling you to scan or enter a barcode and click Save Copy. Destiny then removes the copy from the list. |
Destiny adds the copy to your collection and changes its copy Status to Available.
If a patron had requested this copy, however, a message appears and the Status changes to On Hold.
If you click Delete, the copy is permanently deleted from the collection.